[ROM] [4.2.1] MegaHD Rom For Micromax A116

Biggest Surprise Awated Yet 4.2.1 MegaHD ROM
This is the First Ever Upgrade For Micromax A116 .
(Kindly Follow Instruction To Install ROM , Read Notes Before Post Question. )
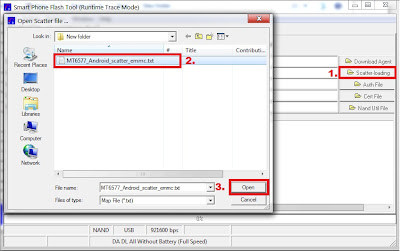
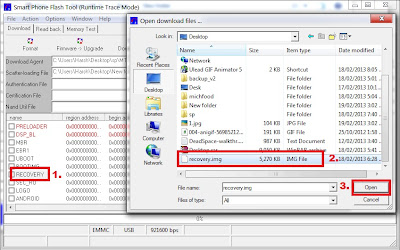
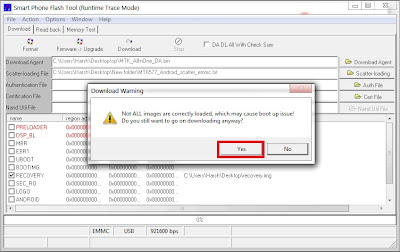
How To Flash :
( You Can Take CMW Backup for Revert back to your old system )
1) Download Rom.zip File
2) Put into External/Internal SD Card
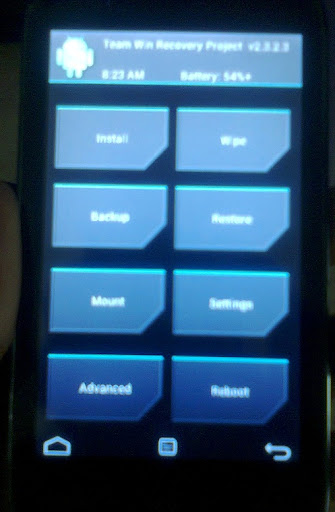
3) Go To CMW Recovery
4) Wipe Data/Factory Reset And Wipe Partition
5) From Advance Menu Do Dalvik Catch Clear
6) From Advance Menu Do Battery State Clear
7) Go in Mount And Storage select FORMAT SYSTEM
8) Select Intall From SD and Select File And Click YES
9) Select Rom.zip And Select YES
10) Reboot Your System
11) Enjoy
Disclaimer :
I Will Not be Responsible For Any Brick or Any Problem So Flash At Your Own Risk.
Thank You.
Biggest Surprise Awated Yet 4.2.1 MegaHD ROM
This is the First Ever Upgrade For Micromax A116 .
| MegaHD Rom Features -> Android 4.2.1 -> New Baseband -> Faster And Smoother -> Pre-Rooted -> busybox -> init.d Added -> Faster Streaming -> Net Speed Tweaks -> Signal Tweaks -> Fast Reboot -> Better Responsiveness & Speed -> Ziplagined and Deodexed |
Download V1 : https://docs.google.com/file/d/0B10g...QzA/edit?pli=1
Update Fix : http://q.gs/48y1H
(Kindly Follow Instruction To Install ROM , Read Notes Before Post Question. )
How To Flash :
( You Can Take CMW Backup for Revert back to your old system )
1) Download Rom.zip File
2) Put into External/Internal SD Card
3) Go To CMW Recovery
4) Wipe Data/Factory Reset And Wipe Partition
5) From Advance Menu Do Dalvik Catch Clear
6) From Advance Menu Do Battery State Clear
7) Go in Mount And Storage select FORMAT SYSTEM
8) Select Intall From SD and Select File And Click YES
9) Select Rom.zip And Select YES
10) Reboot Your System
11) Enjoy
Disclaimer :
I Will Not be Responsible For Any Brick or Any Problem So Flash At Your Own Risk.
Thank You.